 |
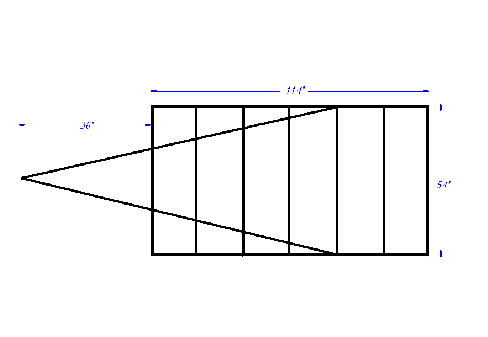
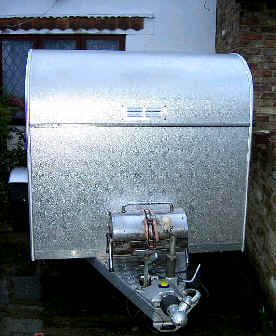
How to Build Tear drop trailers By Steve'y LangWell Im gonna try and show you how to build a teardrop trailer so here goes, A couple of years ago I started to tire of tenting at rod runs and started to think about caravans but the problem is they are big and cumbersome. I had seen a couple of Teardrops in the states and thought why not, you can get all the comforts just in a smaller package, Most Teardrops are 8ft long 4ft wide 4ft high, Now that is the size that they build them to in the states because its easy to get out of 8ft x 4ft sheets of ply. I wanted my Teardrop a little more swoopy so my sizes are 9ft 6ins long 4ft 6ins wide 4ft high its up to you what size and shape you make it you can still follow my build just remember to insert your own sizes. Well first job is to assemble a chassis, now you can do as I did and make a chassis or as a friend has done and get an old caravan and cut the chassis down to 8ft x 4ft. I will deal with my way but as Hotrodders I expect you will make your own mods to suit. Below is a drawing of my chassis it is a simple ladder chassis and was made from 2 x 1 10swg box tubing which is fairly cheap and easily bought.
There are 5 mounting brackets welded to the side rails for mounting the body panels. As ever I expect you will design your own little bits and pieces in to the chassis for instance mine has a 30 gal water tank in the centre just in front of the axle which came from an old caravan the axle is leaf sprung. Axles, towing hitch etc can be got from most breakers these days although I bought an old caravan for £100 and used the fridge, sink, axles, etc etc. When putting this together make sure it is square just keep going round measuring to make sure. We dont want a wobbly one do we ! Well you should have a basic chassis now so just a quick word about safety. When reading this I am assuming you are able to weld to a decent standard if you cant there is no need to worry just tack weld everything together and get someone who can weld to finish weld everything, This needs to be as safe as a car as you will be towing it at speeds up to 60 mph and we do not want it coming apart at the seams do we !. Well we can now move on to the body and there are basically 2 ways of making this, you can either use sheets of Ply or build a framework from something like ¾ steel tube and covering with aluminium sheet. I used the board method as I think the frame way is very time consuming and slow. An alternative to using Ply is to go to a commercial vehicle scrapyard and cut out the side of a Truck body, this is what I did as it is a Marine ply laminate covered both sides in a covering of GRP it is very strong and easy to repair should you get a knock and another bonus is its cheap as you should get enough to do 2 sides & floor for about £20. If you decide to use this it comes in a several thickness but I chose 15 mm. Or go the ply route which you can varnish should you wish for a traditional look Well next job is to cut the board to a rectangular shape the length of your chassis (remembering that the body will go past the chassis end and come back again) and the height that you want, At this stage you need to decide whether you want a skirt on your teardrop. I used one as it covered all the chassis and running gear and made the teardrop look much lower (Very cool) then draw your shape on the board, Do this several times and then decide which one you like best, At this point you should have something that looks like the picture below.
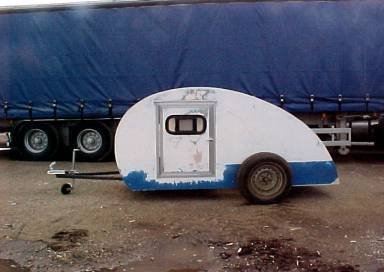
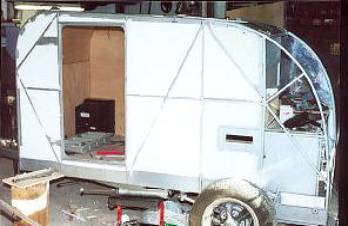
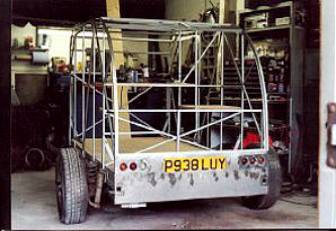
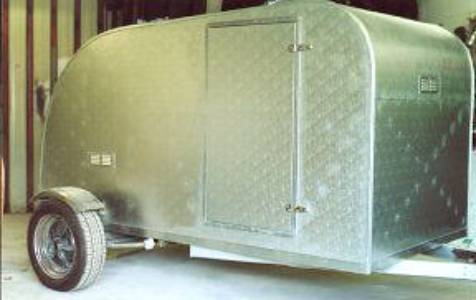
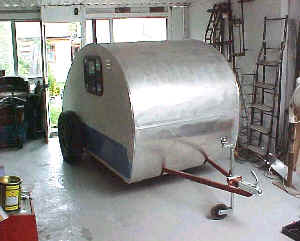
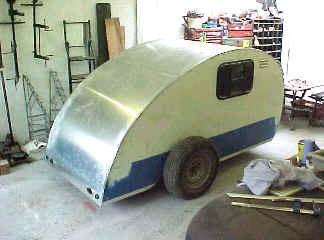
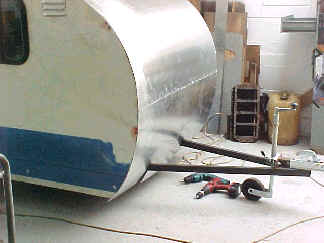
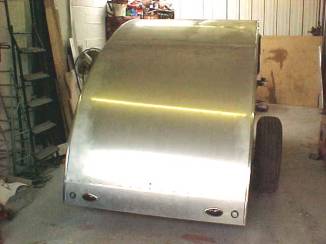
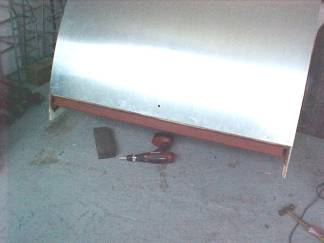
Now you are happy with overall shape you can now start cutting out, I found a Jigsaw was perfect for the job, MIND YOUR FINGERS. Once you have done this clamp your template to the other board and use this as a guide, It is imperative that both sides are identical, Having done this I then clamped both together and ran a electric planer over the edge to make sure they were absolutely identical. Dont do this in the front room its messy. You can now fix the sides to chassis, I used 5 x 10mm bolts on each side which bolted through tabs I had welded on side chassis rails, Large mudguard washers stopped them pulling into board. The other option is to make a frame work and skin it with aluminium sheet, Steve Walker a friend of mine has gone this route built on a chopped caravan chassis it is exceptionally strong but quite heavy and is all down to time and personal preference. He has lined the inside with Polystyrene to insulate for noise & heat. I have included some pics of Steves Teardrop for those that would like to follow this route.
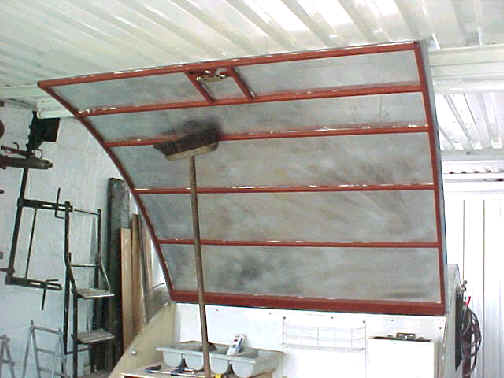
Next job was to fit roof cross members now its up to you what you make these from I was gonna use hardwood but having seen how the frame was made from good old softwood on normal caravans I decided to use this and its cheaper too !. (Hooray) I started off by marking a 2 x 1 squares every 12 along the roof edge and then used my trusty Router to route these out to a depth of 5 mm, The roof cross members were made from ordinary planed 2 x 1 wood and are secured with Sikaflex which was clamped overnight until set. (Sikaflex is a trade name for a sealant / adhesive which is used for bonding and sealing, Does exactly what is says on the tube really, you should then have something that looks like the next picture.
I have already cut out door / window apertures here but you can cut when it suits you. Roof cross members are fitted as far as rear hatch hinge which is inline vertically with axle.
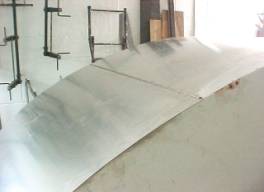
You will notice that I have fitted the rear wall here to support the sides The roof was next on the agenda and Sikaflex was applied along side edge and along cross members and then covered with 16 SWG aluminium sheet which was drilled, countersunk and screwed as well. This added to the stiffness of the body a huge amount and looked great. The screws will be hidden by a aluminium finisher which will be fitted later. I will fit a inner roof liner later when I move onto the interior fitments Next on list of jobs was to make the rear hatch
but first I had to find a hinge, I found what I required in a B & Q type
place and it turned out to be a Stainless Steel Piano hinge this cost £15 and
turned out to be long enough to do the door as well, Result.
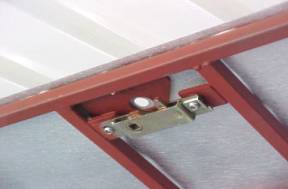
The hatch skin was made from the same aluminium as the roof and simply bonded on. ( a lot of people have questioned this type of fitment and all I can say is that a lot of modern car wings are fitted this way and I have seen instances where the metal has torn before the joint has) a Model A door handle was added and bingo we had a working hatch. To keep hinge watertight I will fit rubber seal later after painting.
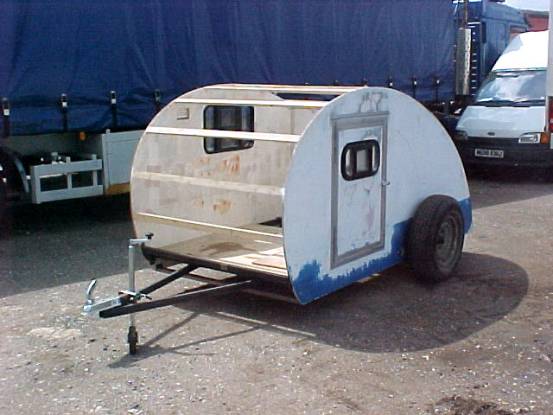
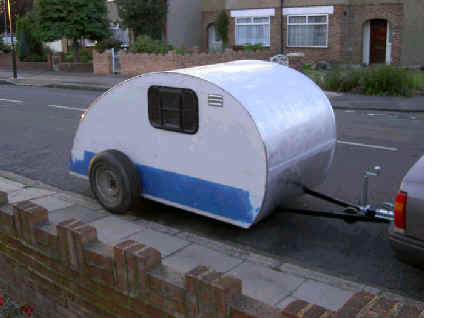
You should now have something sitting in front of you that looks like the following pictures Or if you went the tube route something like this!
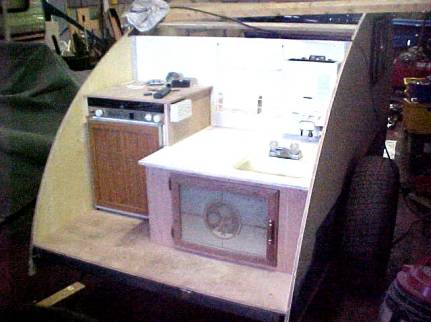
The rest is now really up to you kitchen is all about personal preference so I wont go there, Probably best to speak to her in doors about it seeing as she will probably be using it. LOL
This article was really just to show the basics a lot depends on personal preference so once you have the basics go ahead and stamp your own look on it, Should you require any help on anything just email me Click here . Good Luck with your project , Langy
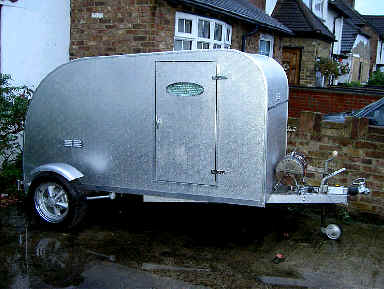
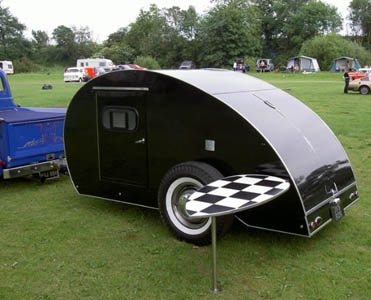
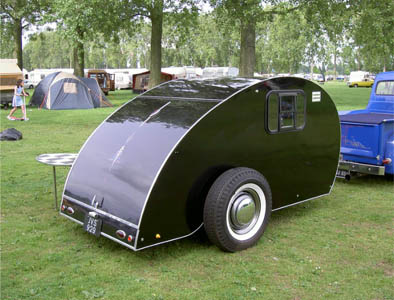
This company has many branches through out the country and are suppliers of Truck Body materials. They carry sheet of all sorts of sizes and many different mouldings for finishing ends & edges and also stock many different types of Piano hinges. The Moulding I use for finishing edges is Part No CC1 is made of aluminium and takes a nice polish. Hope this encourages you to have a go Langy! Finished article To be honest there is more to it than these photos Steve is being modest. The kitchen area is real clever in that the cooker top slides out to make life easier and the sleeping area is really well laid out and plush. I will get some photos that do it more justice, when I am at a Run and Steve is there. For now enjoy these that Steve has just sent me. Aint the table idea cool eh!
|
| Back to Top |
| All images and content Copyright © UK Hot Rods. Design by Alley Kat Internet. Content by Holmsey and UK Hot Rods members. |